|
|
||
ResearchUnderstanding PneumaticsWe know that pneumatics are a source of extra power that we think we should use, but we also do not want to make our Robots too complicated. Because we were not familiar with pneumatics, they seemed very complicated, so we did some research, watching the following videos on YouTube:
The programming video was fairly outdated and not very helpful, so we consulted the PROS documentation, which showed that we only need one function for controlling pneumatics: Pneumatic Part BreakdownFor storing compressed air, we can use up to two air reservoirs each charged to 100 psi. Air reservoirs have an input valve for charging it with compressed air, then an output valve for sending air to other components. We can charge the reservoirs with a bike pump.
To control whether or not the air is being sent to components, we can use a shut off valve that either lets air pass through, or blocks air from the reservoir and discharges air from the charged components:
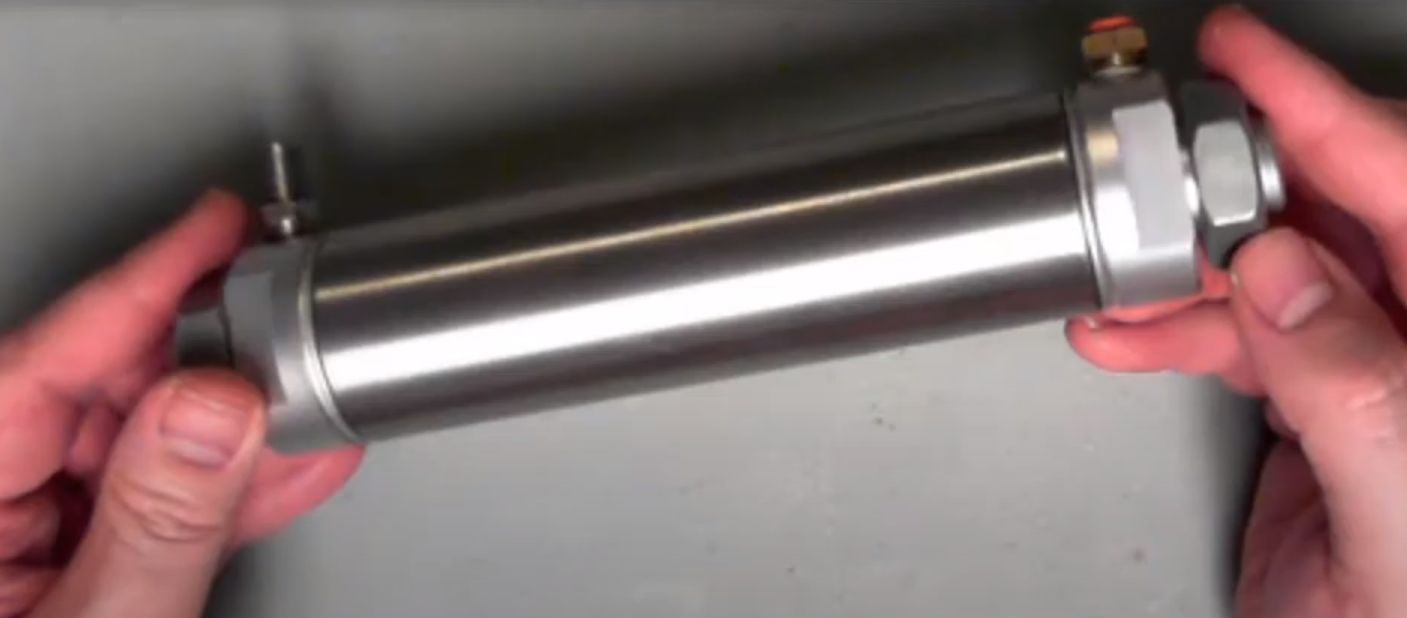
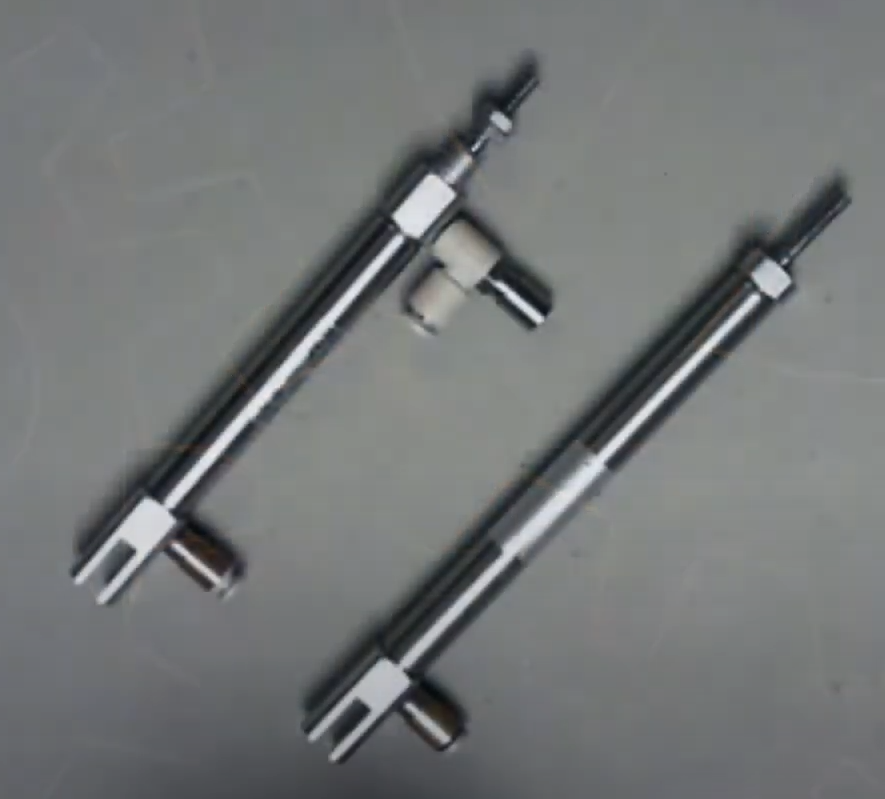
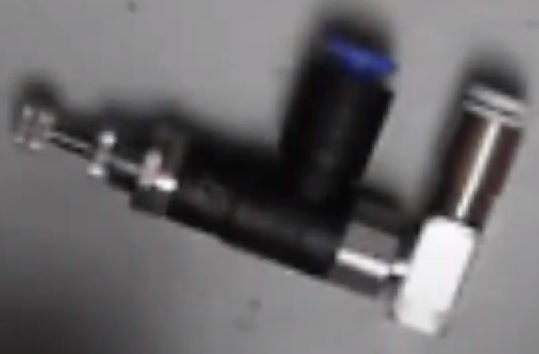
The two pneumatic actuators are single- and double-acting pistons. Single-acting pistons (right) have a spring that pulls them in, then uses a single input of compressed air to push against the spring to extend the rod. Double-acting pistons (left) have no spring, but rather two input valves at other ends of the chamber. Air is let into one end at a time, and released from the other end to push the rod in both directions. Double-acting pistons can be more powerful because they do not need to work against a spring, but they also use more compressed air, needing it for both actuation directions.
To control when and where to send compressed air, we can use electronically controlled single- and double-acting solenoids, which each take one input and control when to send compressed air to either one or two output valves respectively.
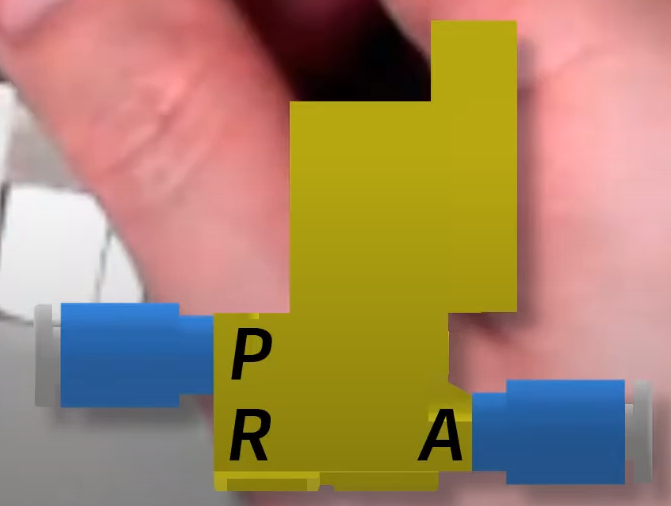
Single-acting solenoids get pressure from the “P” valve, connected to the reservoir. When they are powered by the Brain, they allow pressure to flow to “A.” When they are not powered, all pressure from “A is allowed to flow to “R:”
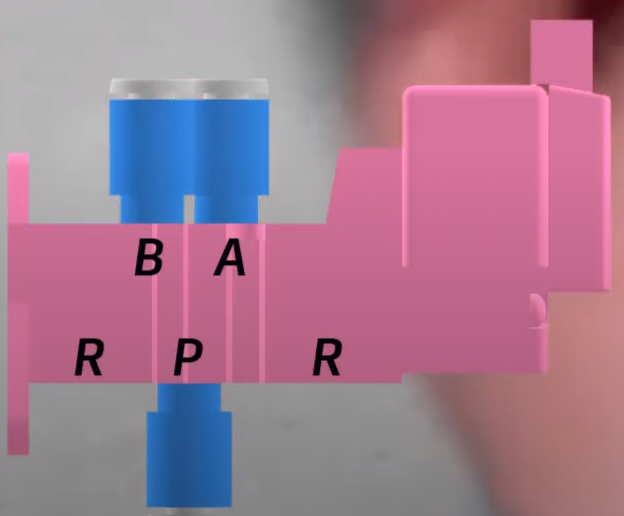
Double-acting solenoids also get pressure from the “P” valve, connected to the reservoir. When they are powered by the Brain, they allow pressure to flow to “A,” and all pressure from “B” is allowed to flow to “R.” When they are not powered, they allow pressure to flow to “B,” and all pressure from “A” is allowed to flow to “R.”
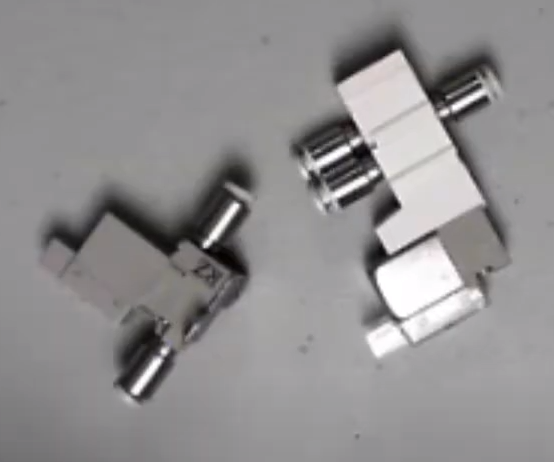
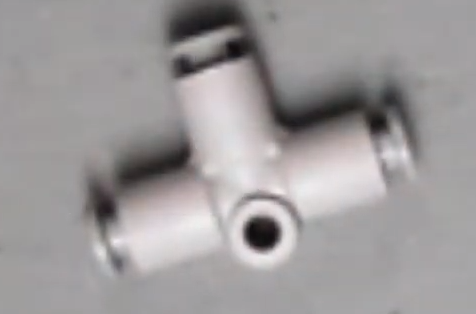
The reservoir only has one output, so to be able to use more than one component, we can use “t fittings,” which take one input and output the pressure to two other paths. For this particular part, it does not matter which valve is used as an input.
We might not always want to use the pressure of the reservoir at full power, so we can use pressure control valves to reduce the pressure coming from the reservoir, by rotating the setting knob (shown at the left):
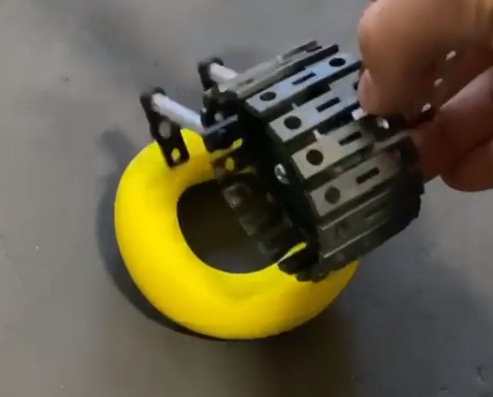
86868R Test IntakeOn Instagram today, we found a video posted of a team testing an intake concept on a 3D printed Ring. They attached standoffs to chain attachment links and used lock bars for scooping up Rings:
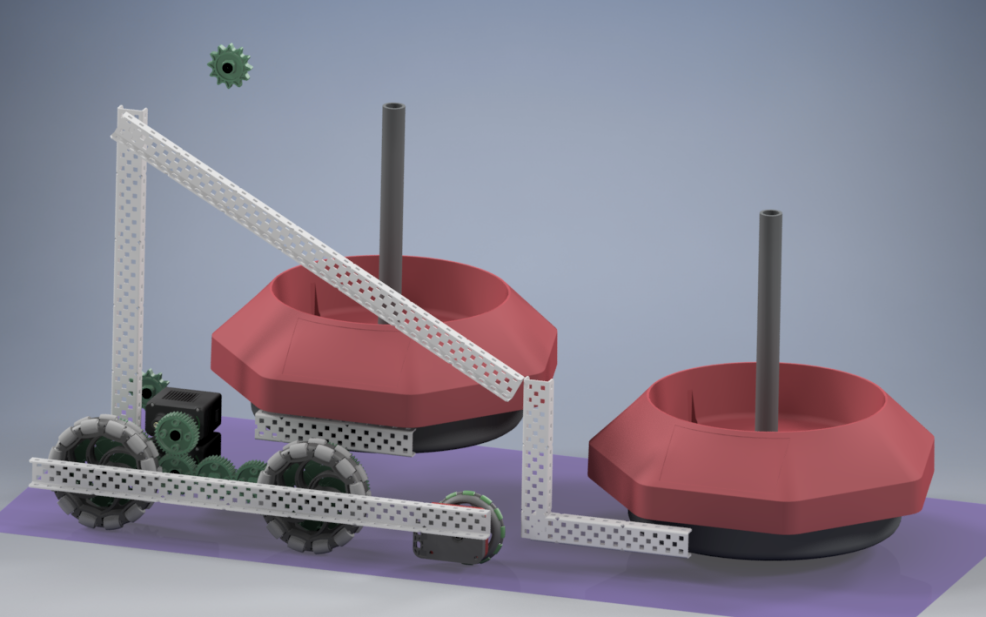
It appeared to pick up the Ring very well, however, it looked like it only would work if the Ring was in the perfect spot, which is unlikely to happen in Matches. BrainstormingFleshing Out Robot-0.2.3Today we made a better plan of Robot-0.2.3 from yesterday:
Not Using This DesignAfter thinking through how we think we would build this concept in the CAD above (in accordance with Design Goal #2 from "Design Brief: Set Team Goals," 5/23/2021), we do not think it would be a good idea to build a robot like this, because it would be too complicated, going against Design Goal #1 (Design Brief: Set Team Goals, 5/23/2021). The CAD showed us that, for the design to work, we would need the forklift to deploy, and possibly even the Ring intake because it needs to stick so far back. Even if that did work, we would need the Rings to move at a series of difficult angles with very little room. We are going to continue looking for other alternatives. |
||
-
 The 7 Dorks
the7dorks333A@gmail.com
The 7 Dorks
the7dorks333A@gmail.com
- homeHome
- sortCategories
- labelTags
- personAbout